NDT | Non-Destructive Testing Services

Our fully equipped in house non-destructive testing lab can perform the following examinations:
- Liquid Penetrant Testing (Both Fluorescent and Visible Dye)
- Ultrasonic Testing (Both Longitudinal Wave and Shear Wave)
- Magnetic Particle Testing (Wet Fluorescent Method)
- Alloy Identification Testing (Thermoelectric Method)
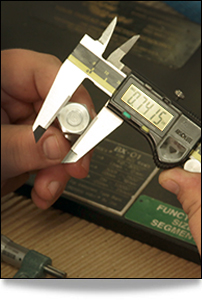
- Visual Examination including Thread Gaging
IAI maintains inspectors qualified in accordance with both military as well as commercial specifications (MIL-STD-2132, SNT-TC-1A, T9074-AS-GIB-010/271, etc.). NDT testing equipment is calibrated in accordance with commercial as well as military requirements and is traceable to NIST.
Summary of IAI’s Non-Destructuive Services below:
Liquid Penetrant Testing (PT): Liquid penetrant inspection is an inspection technique used to locate surface defects in all types of non-porous materials (metals, plastics, or ceramics). PT is used to detect casting defects, forging and welding cracks and porosity and other surface defects such as hairline cracks. PT is used on both new components and for periodic inspection of in service components. There are 2 basic methods of PT, Visible Dye and Fluorescent Dye. The visible dye method uses a colored dye and developer to reveal any flaws in the surface being inspected while the fluorescent method uses a dye that fluoresces under a UV light. Each method has specific pros and cons and applications. The process is basically the same regardless of the method. First, the part must be thoroughly cleaned to removed and grease, oil or dirt. Next, the dye is applied and allowed to dwell for a predetermined time period. The dye is then removed and a developer is applied. The developer will reveal an indication by providing a sharp contrast to the color of the visible dye or by causing the indication to fluoresce under UV light.
Magnetic Particle Testing (MT): Magnetic particle testing is a non-destructive testing method for identifying surface and slightly subsurface discontinuities in magnetic materials such as iron, nickel, cobalt, and some of their alloys. MT works by creating a magnetic field in the part by applying either an AC or DC current to the part or by placing the part inside of coil that creates a magnetic field. The magnetic lines of force generated are perpendicular to the direction of the electric current; therefore this inspection detects surface discontinuities in specific orientations depending on how the application of the magnetic field is arranged. The application of the magnetic field may have to be performed in several different configurations to ensure complete inspection of the entire surface.
The presence of a surface or subsurface discontinuity in the material causes the magnetic forces generated to be interrupted. A powder composed of iron particles is applied to the surface after the magnetic field is formed. The areas where the magnetic field is interrupted cause these particles to stick to the surface and reveal an indication. MT can be done by either a dry method which uses dry colored iron powder that is visually detected or a wet method which uses fluorescent iron particles that are observed under a UV light.
Ultrasonic Inspection (UT): Ultrasonic testing is a non-destructive testing technique using the principle of reflecting sound waves. In most common UT applications, frequencies ranging from 1-15 MHz are used. Ultrasonic testing may be used for thickness measurement as well as detecting flaws. IAI performs 2 types of ultrasonic inspection techniques, longitudinal wave and shear wave. IAI performs all UT inspections using the contact inspection method, which requires the application of a couplant to the surface and then the transducer is placed directly onto the part. The contact method allows for much more flexibility in testing oddly shaped parts as compared to other methods such as immersion.
Ultrasonic testing works on the principle of sound wave propagation. When a sound wave is generated in a part it will continue to propagate in a direction until it hits a “reflector”. A “reflector” is any type of inconsistency in the material that causes the sound to bounce or change direction. This can be as simple as the back side of the part or some type of flaw inside the part. The longitudinal waves are used to measure thickness, but may also be used for flaw detection, while shear waves are used exclusively for flaw detection. A longitudinal wave is a straight wave that is transmitted in a straight line into the part to be tested and hits a reflector and bounces back. A shear wave is a wave sent into a part on an angle and bounces around inside the part before coming back to the transducer. Depending on the configuration of the UT transducer used the angle at which the shear wave is introduced into the part can vary and will be matched to the geometry of the part and the type of potential flaw.
Alloy Identity Testing (AI): (Thermoelectric Method) Thermoelectric Alloy Sorting utilizes a principle known as the Seebeck Effect. This is the same effect the makes an ordinary thermocouple work. A probe consisting of a heated contact and a room temperature contact is touched to a test sample. This forms a thermocouple type circuit. A small voltage is generated by the difference in the thermoelectric response to the hot and cold contact and can be directly correlated to the alloy type. This type of testing relies on using a known standard for the material being tested. The equipment is setup using the standard. The parts to test are then compared to the results from the standard. The result of this type of AI is simply a pass/fail result, since it just confirms that the sample is the same or different than the standard. ASTM E977 governs this type of alloy testing.
